Save space on your hosting account using Gmail
Table of contents
- How email affects your hosting account's quota
- Using Gmail as your email storage
- The Accounts and Import interface
- Set up Gmail to receive mail sent to your domain's email address
- Set up Gmail to send mail using your domain's email address
- How to make your domain's email address the default sending address in Gmail
- How to remove your domain's email account from Gmail
- Summary
How email affects your hosting account's quota
When you buy a shared hosting account, you are allocated a certain disk quota, or amount of storage space. This is used for all purposes, but mainly to store the website's files, databases and emails.
A website's files and databases usually take a low and predictable amount of space, which can easily be managed.
The space taken by email on the other hand, increases with every new email that you send or receive, and is quite uncontrollable. If left unchecked, email will pile up and eventually fill up the entire quota!
An account which exceeds its disk quota might cause websites in it to stop working, in addition to not allowing you to send or receive any more email, until you have freed up some space.
Hosting providers usually offer various solutions to this, such as special email packages. An alternative and costless solution, which we show in this article, is to utilise a third-party email service like Gmail.
Using Gmail as your email storage
A Google account comes with 15GB of space, which is shared between Gmail, Drive and Photos. If you're not using Drive and Photos much, most of that space will go towards Gmail storage.
That amount of space is more than what most shared hosts will allow you to use for email. You can leverage this by setting up Gmail to use your domain's email account on your behalf, and while doing so, store emails on Gmail instead of your web server.
Linking the accounts this way will allow you to use them both from Gmail's interface, but keep in mind that this will cause their respective emails to be gathered in the same inbox and sent folders! For this reason, we recommend to only use this method if you don't mind mixing the two.
The Accounts and Import interface
The Accounts and import tab in Gmail's Settings page, contains the interface that is the starting point for all following configurations. Here's how to navigate to it:
Sign-in to your Gmail account. Create an account first if you don't have one.
Find and click the gear-shaped Settings button, located near the top-right corner of Gmail's interface.
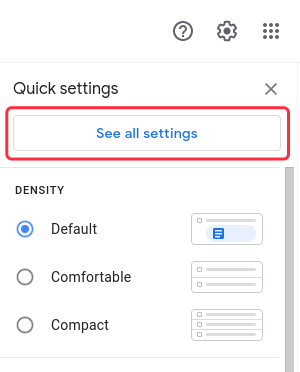
The Quick settings panel will open. Click See all settings.
A new page will open. Go to the Accounts and import tab.


Set up Gmail to receive mail sent to your domain's email address
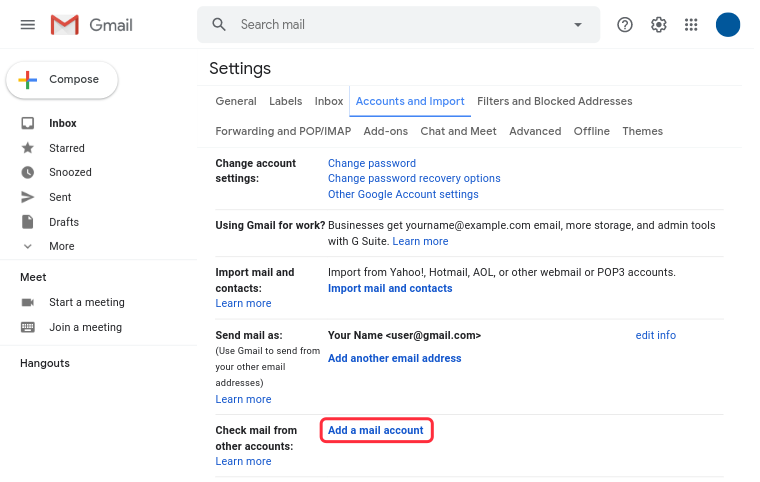
Go to Accounts and import and find the Check mail from other accounts section. Click Add a mail account.
The Add a mail account pop-up will open, starting the process.
Enter your domain's email address next to Email address, and click Next.
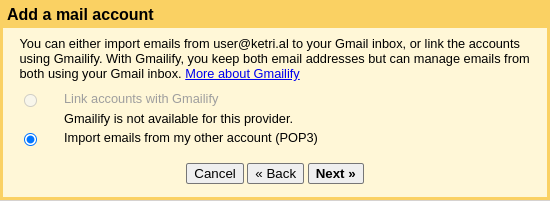
In the next interface, you are asked whether you wish to use a Google service called Gmailify. Normally this service is not available for shared hosting accounts.
Select Import emails from my other account (POP3), and click Next.
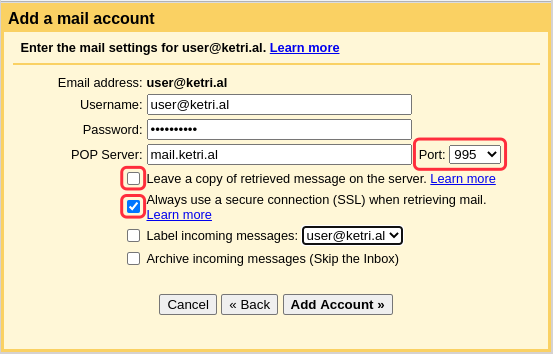
In the next screen, you must enter the access credentials for your domain's email account, and select the desired options.
Username - enter your domain's full email address as the username.
Password - write the password for your domain's email account.
POP Server - enter your mail server. Normally this is the same as your domain, or a mail subdomain of it. Ask your hosting provider if neither of these works.
Leave a copy of retrieved message on the server - this option instructs Gmail to leave retrieved messages on your server after importing them, instead of deleting them.
This means you will have 2 copies of every incoming email - one in your domain's account and one in your Gmail account.
Make sure NOT to choose this option, otherwise your server will continue to store your emails.
Always use a secure connection (SSL) when retrieving mail - this option makes Gmail connect to your domain's mail server using secure (encrypted) TLS/SSL connections.
If you select this option, combine it with port 995. Otherwise, select port 110.
Port - in this tutorial, we use the default port for each type of connection. If any of them doesn't work, ask your hosting provider for the correct port number.
If you are using a secure TLS/SSL connection, select port 995.
Port 110 can be used for insecure (unencrypted) connections. Using this type of connection poses a security risk, so we don't recommend it.
Label incoming messages - this option allows you to label all the emails that Gmail retrieves from your domain's account. This way, you can easily tell them apart from other emails.
To add a new label, click on the drop-down menu and select New label... - then write the phrase you wish to use as a label, and click OK.
Archive incoming messages (Skip the Inbox) – selecting this will make imported emails be automatically archived, instead of going to the inbox.
Click Add Account to confirm the settings.
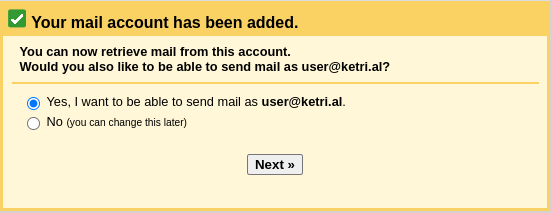
The Your mail account has been added pop-up will open, signalling that Gmail has successfully been set up to receive email messages sent to your domain's email address.
Through this interface, you can choose whether to configure Gmail to also send mail through your mail server, using your domain's email account and address as the sender.
Yes, I want to be able to send mail as... – select this option if you wish to be able to use Gmail to send mail from your domain's email address.
Click Next, and follow the instructions in section Set up Gmail to send mail using your domain's email address.
No (you can change this later) – select this option if you don't wish to be able to use Gmail to send mail from your domain's email address.
Click the Finish button, which will appear after selecting the option, and follow the next step.
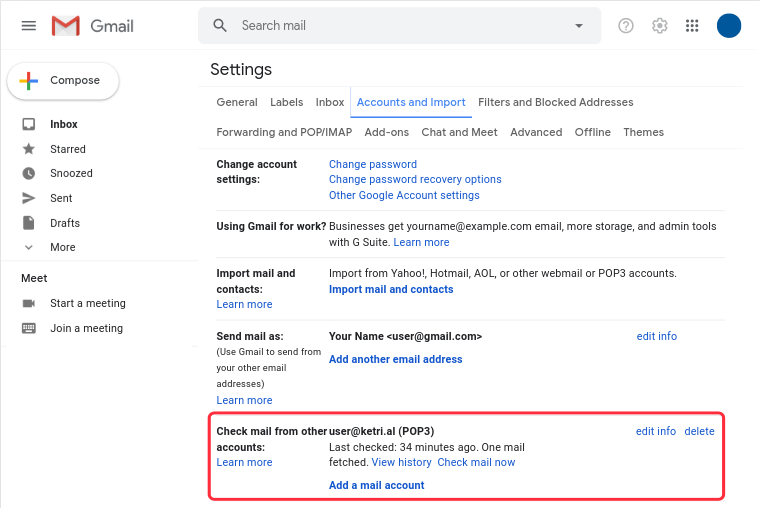
The process of setting up Gmail to receive mail from your domain's account is complete.
Any email sent to your domain's email address, will now be transferred to your Gmail account and removed from your web server, freeing up space and preventing clogging.
You can see the email account you just added, under the Check mail from other accounts section in Accounts and import.

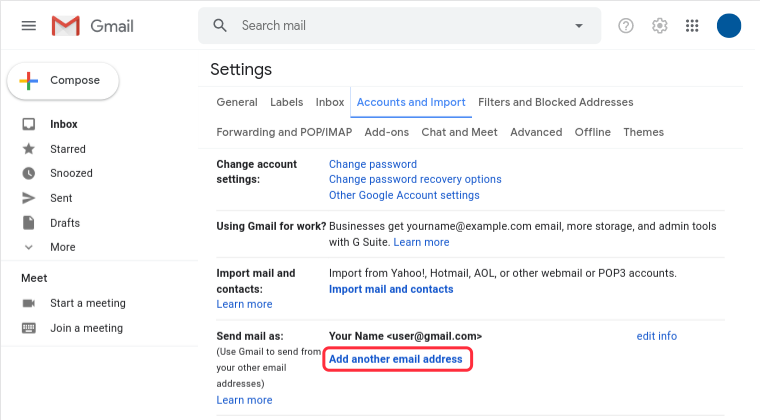
Set up Gmail to send mail using your domain's email address
Go to Accounts and import and find the Send mail as section. Click Add a mail account.
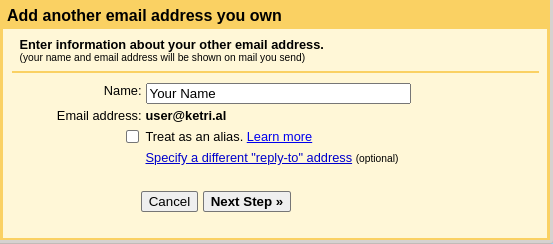
The Add another email address that you own pop-up appears, where you can enter some initial settings.
This is also where you continue if you selected Yes, I want to be able to send mail as ... in the previous section's step 5.
Name - write the name you wish to use. This name will appear to the people you send email to.
Treat as an alias - if you select this option, emails sent from your Gmail account to your domain's email address, will be labeled as sent from "me". Otherwise, they will be labeled as sent by the domain's email address.
Click Next Step to continue the configuration.
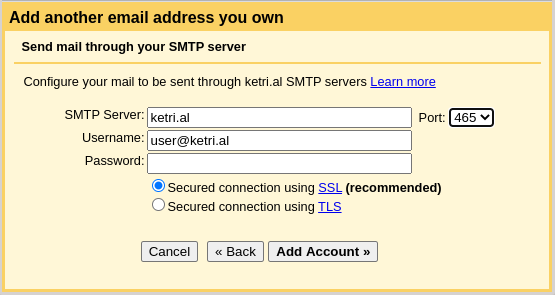
In the next window, you must configure the connection to your domain's SMTP server.
SMTP Server - enter your domain's SMTP server. Normally this is the same as your domain, or a mail subdomain of it. Ask your hosting provider if neither of these works.
Port - since this configuration only supports secure connections via TLS/SSL, choose port 465.
Username - enter your domain's full email address as the username.
Password - write the password for your domain's email account.
Secured connection using SSL (recommended) - this option enables secure connections via SSL between Gmail and your domain's email account. Select this option if you are not sure whether your mail server supports TLS.
Secured connection using TLS - this option enables secure connections via TLS between Gmail and your domain's email account. TLS is a newer version of SSL, so select this if your mail server supports it.
Click Add Account. A confirmation email will be sent to your domain's email address.
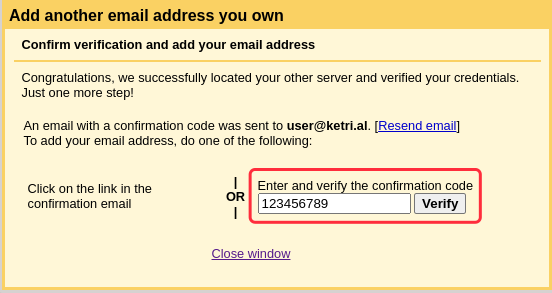
After completing the previous step, possibly with a bit of delay, you will receive an email from Gmail at your domain's email account.
It will contain a verification code and a confirmation link, each of which can be used to confirm your previous request.
You can confirm using any of these two methods:
• Copy the verification code and follow the next step.
or
• Click the confirmation link (or visit that URL in your browser) and proceed to step 6.
If you chose to confirm using the code, you will need to use it within the Add another email address you own pop-up window.
Paste the verification code in the field under Enter and verify the confirmation code.
Click Verify and proceed to step 7.
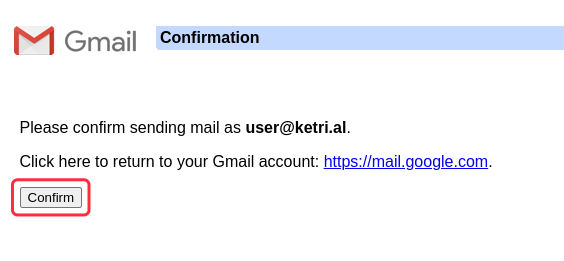
If you chose to confirm using the link, a page will have opened. Click the Confirm button in it, and follow the next step.
The process of setting up Gmail to send mail using your domain's email address is complete.
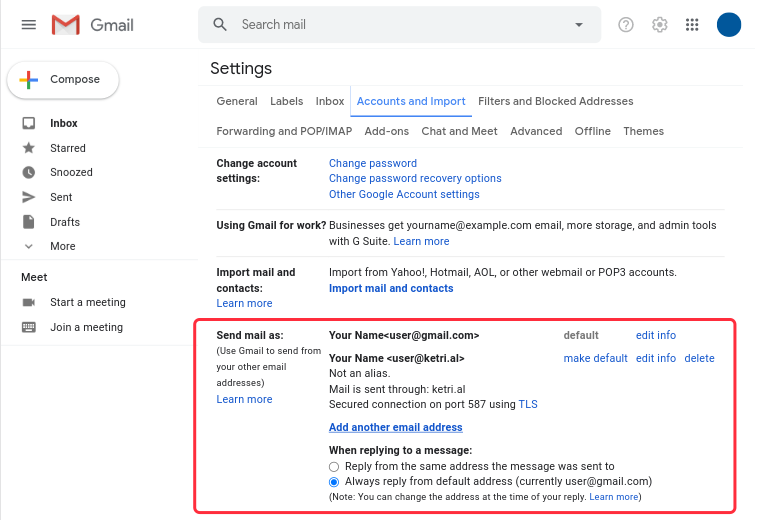
You can see the email account you just added, under the Send mail as section in Accounts and import.
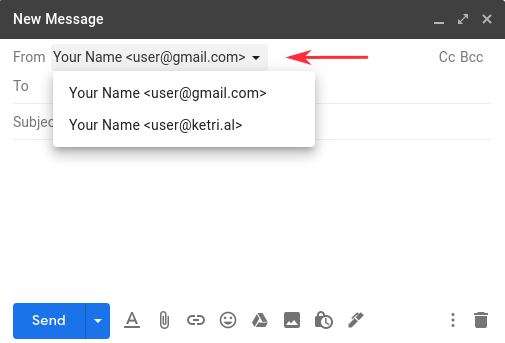
Now, when you compose a new email in Gmail, you will have the option to send it using your domain's email address, instead of that of Gmail.


How to make your domain's email address the default sending address in Gmail
When you compose a new email in Gmail, your domain's email address that you just added, is available to be selected as the "sender". However, it's not the default address, so you have to click on the dropdown to select it every time.
Here's how to make your domain's email address the default and pre-selected address when composing a new email.
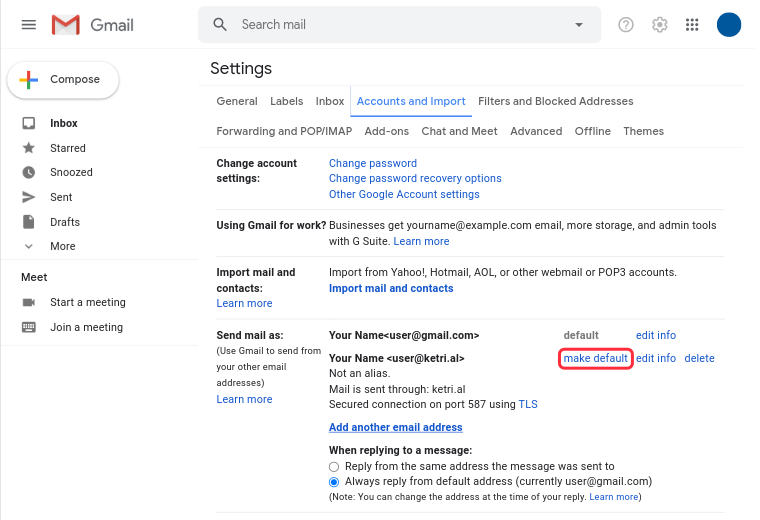
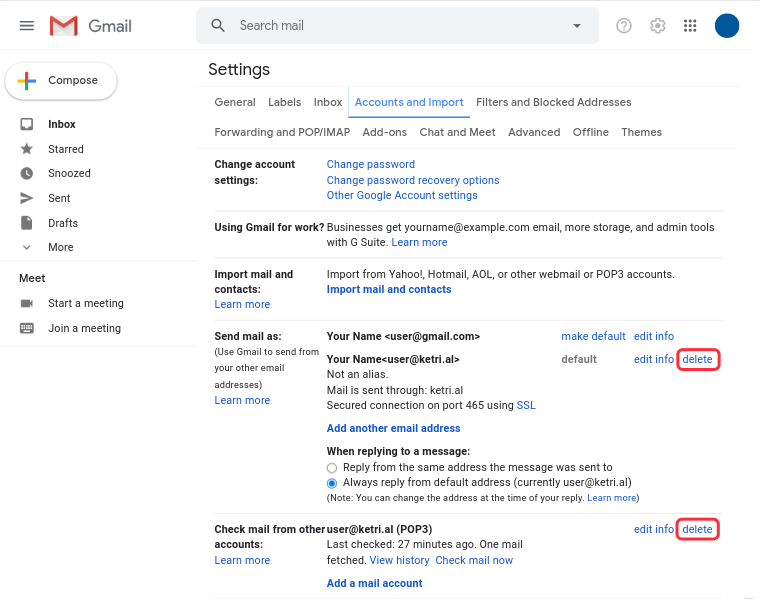
In Accounts and import, go to the Send mail as section and find the email address you wish to make the default sending address. Click the make default button next to it.
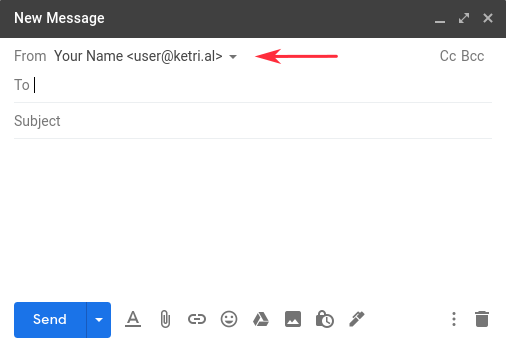
Now, when you compose emails in Gmail, your domain's email address will be the default sending address.
How to remove your domain's email account from Gmail
In Accounts and import, go to the Send mail as section and find the email address you wish to remove. Click the delete button next to it.
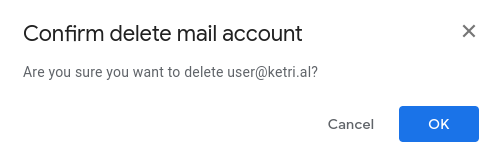
A confirmation pop-up will open. Click the OK button to confirm.
Summary
Server space getting filled by email is a common problem, especially in shared hosting. A costless solution is to connect your Gmail and domain email accounts, and use Gmail for email storage instead of your hosting account.
By following the steps above, you can use your domain email through Gmail. You will be sending and receiving emails through the address of your domain, but you will be using Gmail's interface and storage, saving space on the web server as a result.